The Beast Core 6 Geometry Processor automatically assigns newly uploaded files to the generic “Default” system. Read on to learn how to change system names in a CSV file exported from the Component Processor editing tool.
Geometry Processor Assigns New File Uploads to “Default” System Name
Follow the steps in the Upload Geometry Files article to upload your workspace files into the Geometry Processor.
By default, the program automatically assigns each new file upload to a generic system named Default.
To view a 3D Model of an uploaded file without changing its system name:
Select the system named Default in the 3D Viewer Settings plugin → Groups tab → Unloaded section
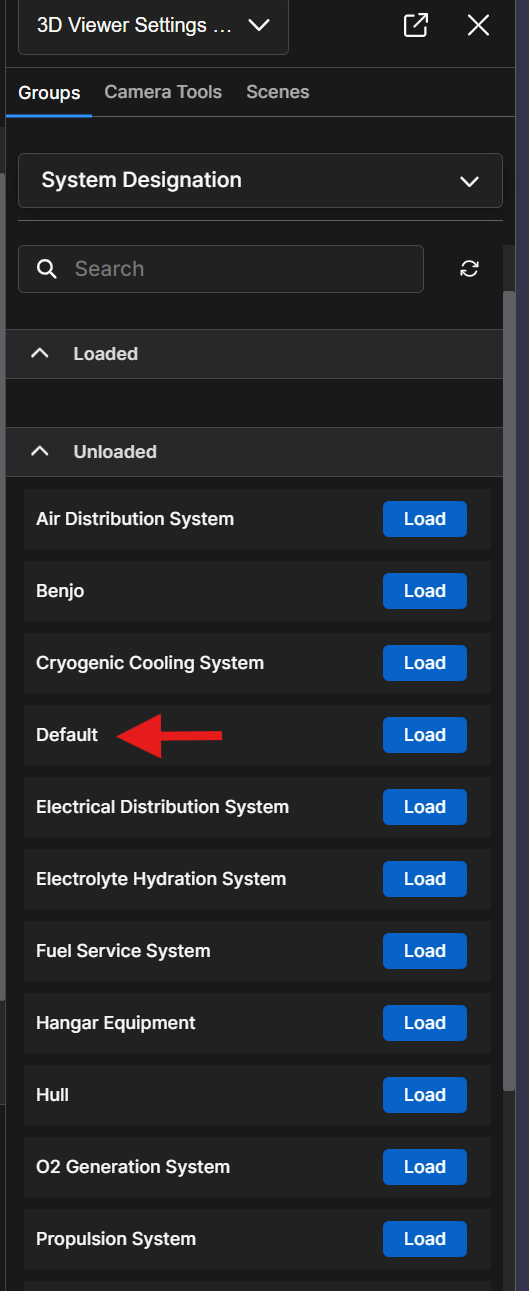
Click the
 button
 Within seconds, a 3D Model of the selected system displays in the 3D Viewer plugin
Change an Assigned System Name
NOTE
Whether you’re changing a system name from the generic Default to its actual name or correcting a typo on a previously assigned system name, the process is the same.
Click the Component Processor
 icon on the far-left side of the screen.
Or select Component Processor in the left-hand navigation pane’s Admin section

Click the
 button at the top of the Process Components screen.
On the Select Component References pop-up window, left click to de-select items not needed in the exported CSV file (if applicable), then click the
 button
Upon performing this action, two things happen simultaneously:
A successful export notification displays in the lower right corner of your screen

The exported file populates in a Save As pop-up window on your screen
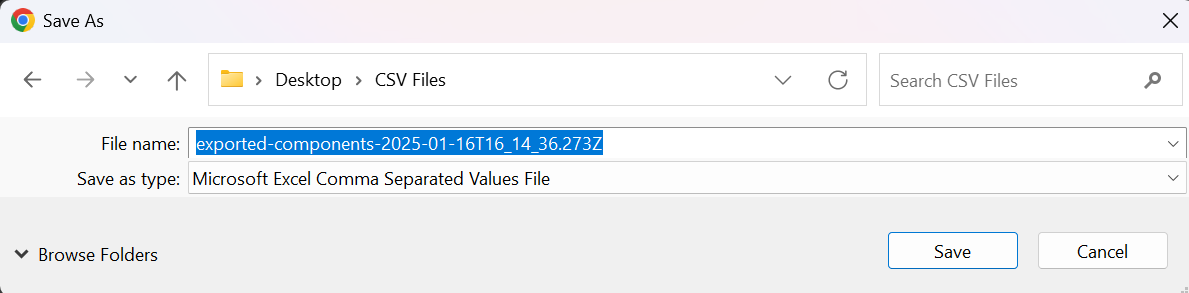
Rename the exported file (if desired) and save it to your device.
Open the CVS file and manually change the Default (or incorrect) system name to the desired system name.
Check your work and save your changes.
NOTE
It’s fine to overwrite the file you saved earlier.
Return to the Component Processor editing tool and select the
 button in the top right corner of the Process Components page.
In the Open pop-up window, select your modified CVS file to populate the empty file name textbox, then click Open.

A successful import notification displays in the lower right corner

To view your changed system name on the 3D Viewer Settings plugin → Groups tab:
Look for the new, alphabetized name in the Unloaded section
NOTE
Select the
 button to view a 3D Model of your renamed system in the System Viewer plugin.