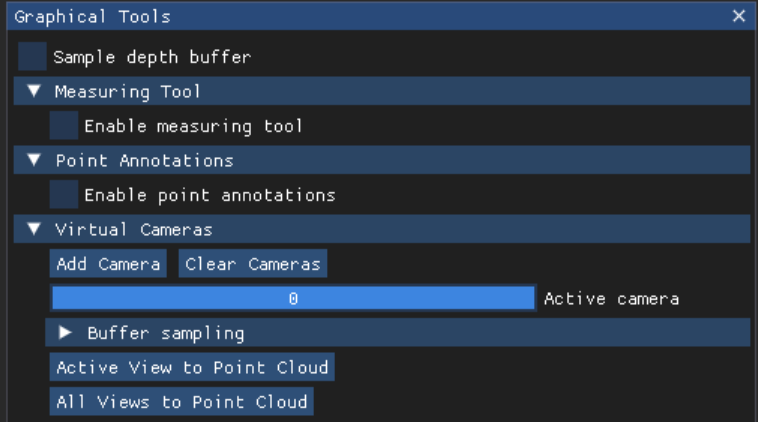
Use the Virtual Cameras option on the LSV Prototype’s Graphical Tools menu to add specific virtual camera vantage point(s) to your loaded session. Adding additional camera angles allows you to cycle back and forth between available camera angles via changing the camera number in the Active camera window.
NOTE
The Buffer Sampling section of the Virtual Cameras menu is not applicable to this article’s content.
Utilizing Virtual Cameras
The Virtual Cameras tool gives you the ability to add multiple camera angles to your scene.
This feature is useful for presentations or for capturing a customized view
RECOMMENDATION
Limit your added camera angles to 10 or fewer for optimal performance.
Click the Virtual Cameras dropdown arrow (if needed) to expand this section of the Graphical Tools menu

NOTE
The number zero in the Active camera window represents the default camera you are actively using when you click on the Model and navigate using the AWSD, Shift, Space Bar, and Arrow keys on your keyboard.
The built-in default camera is always camera 0 in this window
To add a new camera (off of the existing, default camera):
Click the Add Camera button once
The program automatically assigns the number 1 to your first added camera (and the number 2 to your second added camera, etc.)
The Active camera window automatically switches to the newly added camera
Notice that the number 1 now shows as your active camera in this window

To set your desired angle for a newly added, active camera:
Use your navigation keys to physically manipulate your Model to the view you want to capture
Mouse click to select your desired camera angle
NOTE
You may not notice any visible changes in your loaded scene, but your new camera angle is saved.
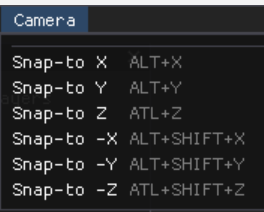
Or, click Camera on the top Navigation Bar and select one of the Snap to options on the dropdown menu

After setting your desired camera angle(s) for your current Model, you can switch between available cameras.
Click and drag the blue slider inside the Active camera window to change your currently active camera to a different camera number
Or, click inside the box and press Tab to enter a camera number manually

WARNING
Clicking the Clear Cameras button deletes all added cameras and resets the Active camera window to the default 0 camera number.

Add Multiple New Cameras at the Same Time
Click the Add camera button once for each camera you wish to add.
Example: Click four times if you want to create four new camera angles
Notice the Active camera window on the Virtual Cameras menu now shows the last camera number you added as the active camera.

Follow Step 4 in the above section to set your desired angle for the currently active camera number.
To set the remaining new camera angles:
Click and drag the blue slider in the Active camera window to switch to the desired new camera number

Repeat Steps 3-4 in this section to set remaining new camera angles
Switch between saved camera angles simply by selecting your desired camera number in the Active camera window

.png)