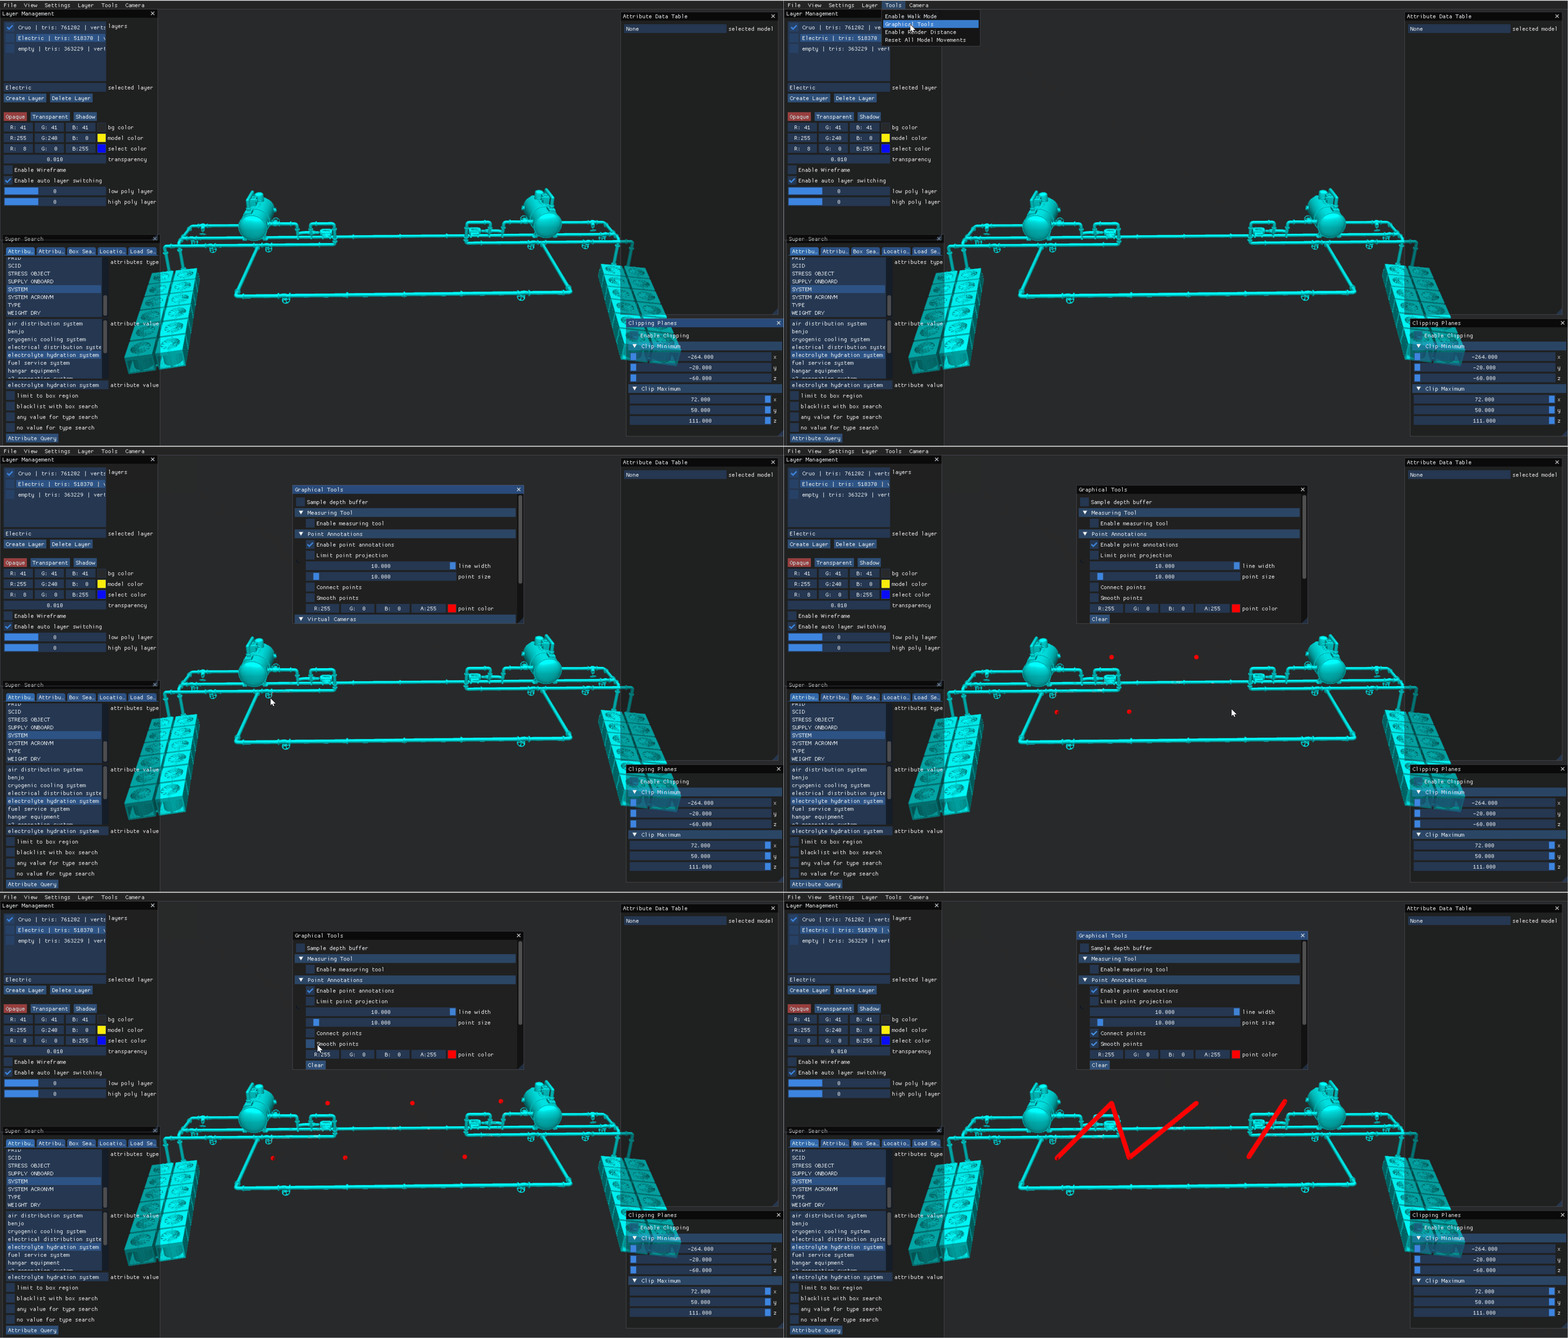
Use the Point Annotation tool in the LSV Prototype’s Graphical Tools menu to mark designated points in your loaded scene.
Utilizing Point Annotations
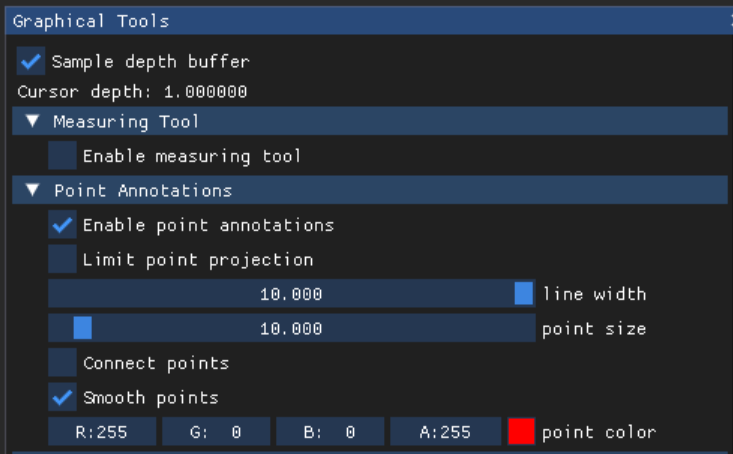
Check the Enable point annotations box to expand the Point Annotations menu.
NOTE
Once enabled, the Point Annotations tool will disable your mouse’s ability to pan and rotate and revert to keyboard control.
You may still use mouse clicks to select items
IMPORTANT: Check the Sample depth buffer box below the Graphical Tools window title.
This sets your Point Annotations on top of the Model you are marking (so your points won’t get buried in other layers)

Use your mouse and left click to create multiple marks throughout your scene.

In the line width and point size check boxes:
Click and drag the small blue slider boxes to adjust these values
Or, left click inside each box and press Tab to type a desired value

You can use the following checkboxes to customize how your points display on the Model:
Limit point projection - Once checked, drag the slider in the Limit Distance box
Or press Tab to type the value of the size of the points added)

Connect points - Once checked, your set points will connect with a track line from the initial starting point through each sequential point

Smooth points - (Checked by default) - Displays circular points

Uncheck this box to display square points
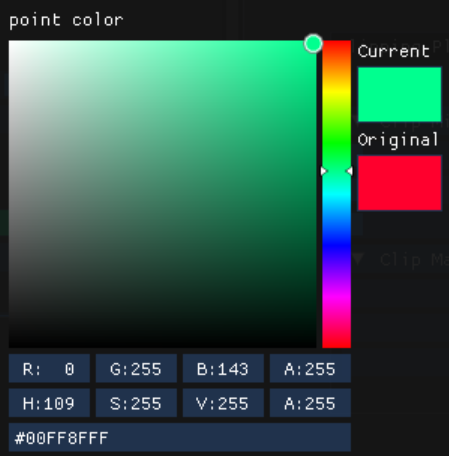
By default, points display in the color red, but you can change to a different color.
Right click on the point color box

Select a new color in the point color pop-up window
