Access the Layer Management window in the LSV to customize the loaded layers in a current scene. View, select, edit, or hide loaded layers; change the scene, model, and background colors; or adjust a layer’s transparency level.
Layer Management Window Navigation
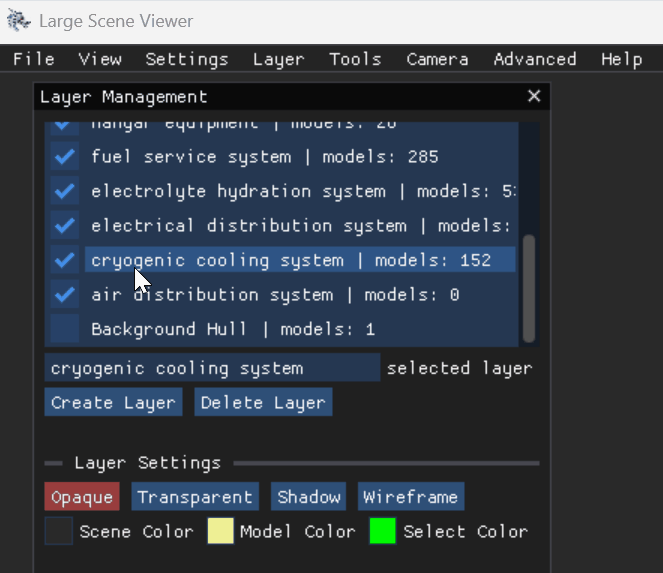
Upon opening the LSV application and selecting a Platform, the Layer Management window opens by default in the upper left corner.
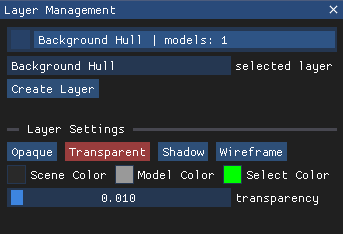
Default window view (prior to loading a Scene) - Shows only the Background Hull of the selected platform
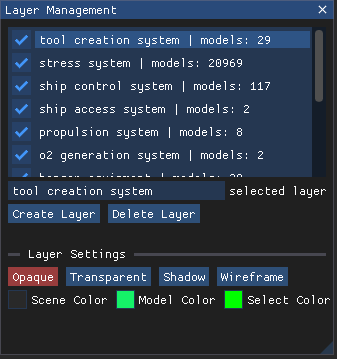
Example window view with several layers loaded
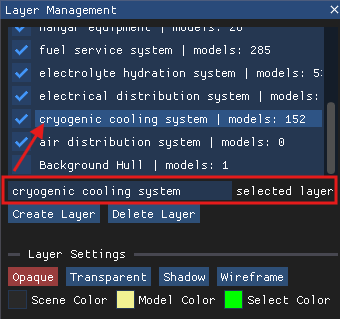
The upper part of the window displays the scene’s loaded layers and select boxes.
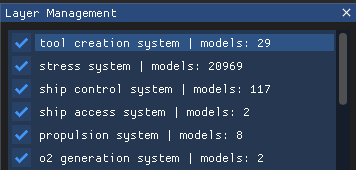
When a scene initially loads, all loaded layers are selected (checked) as visible in the loaded scene
Left click the select box to either:
Uncheck (hide) a loaded layer
Check (show) a previously hidden layer
A text divider within each listed layer separates the layer name on the left
 from the total number of models that layer contains
NOTE
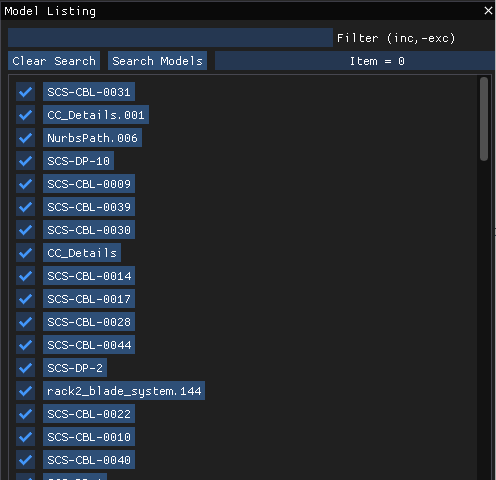
Go to the View → Model List → Model Listing pop-up window to view a list of all models within a selected layer.
Select a Loaded Layer
The selected layer textbox in the center of the Layer Management window displays the currently selected layer.
The selected layer is also highlighted in the list of loaded layers
To select a different layer, single left click on a listed layer name.
The selection highlight moves to the newly selected layer name
The selected layer textbox displays the new layer name
Add a New Layer
Use the Search Tools window to add new layer(s) to a loaded platform.
Refer to the Add Layers to a Scene (LSV) article for more information
NOTE
DISREGARD the
button in the Layer Management window, which will be removed in the next LSV update.
Delete a Layer from a Loaded Scene
Left click the unwanted layer name in the Layer Management window.
Ensure the selected layer textbox displays the intended layer name.
Left click the
 button below the selected layer textbox.
Change Layer Settings
Use the Layer Settings section of the Layer Management window to customize how layers display in a loaded scene.
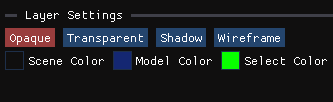
Left click the buttons provided in this section to adjust how solid or transparent a layer appears, add shadow effects, or display a model in lines versus Triangles.
 button - Displays a solid model
 NOTE
The Background Hull is transparent by default and is not selectable in the Opaque view.
 button - Allows the user to see through the displayed models (but they are still selectable)
Left click and drag the pop-up transparency slider to the desired value

 button - Provides shadow effects mimicking light
 button - Turns the model into lines versus triangles
Left click the
 select boxes to change the colors of scene backgrounds, models, and layers.
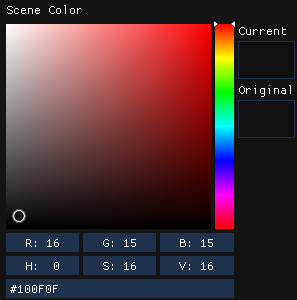
Scene Color select box - Opens the Scene Color box used to select a scene’s background color
Model Color select box - Opens the Model Color box used to customize the color of a selected layer
Select Color select box - Opens the Select Color box used to customize the color of a selected model