Discover how to add a loop of Lesson Fragments (topical segments) within a Main Lesson created in Beast Core 4 Editor. Learn how to set up Fragments and Flags in the Overview tab and how to populate Loop, Decision, and Include Fragment course cards.
Required Prework for Adding Fragments to a Lesson
Decide in advance how many Fragments your lesson will contain and what you want to name them
Left click the +New Lesson button on the Lesson Dashboard to create and name your lesson
Populate your lesson with the following course Cards:
An Environment card
If you select 3D Viewer as your Environment, add the required Load 3D Systems course card
If you desire to show a specific view of the 3D Model, add the Go To (Position) course card
An Information card (for lesson introduction content)
An unedited Loop card
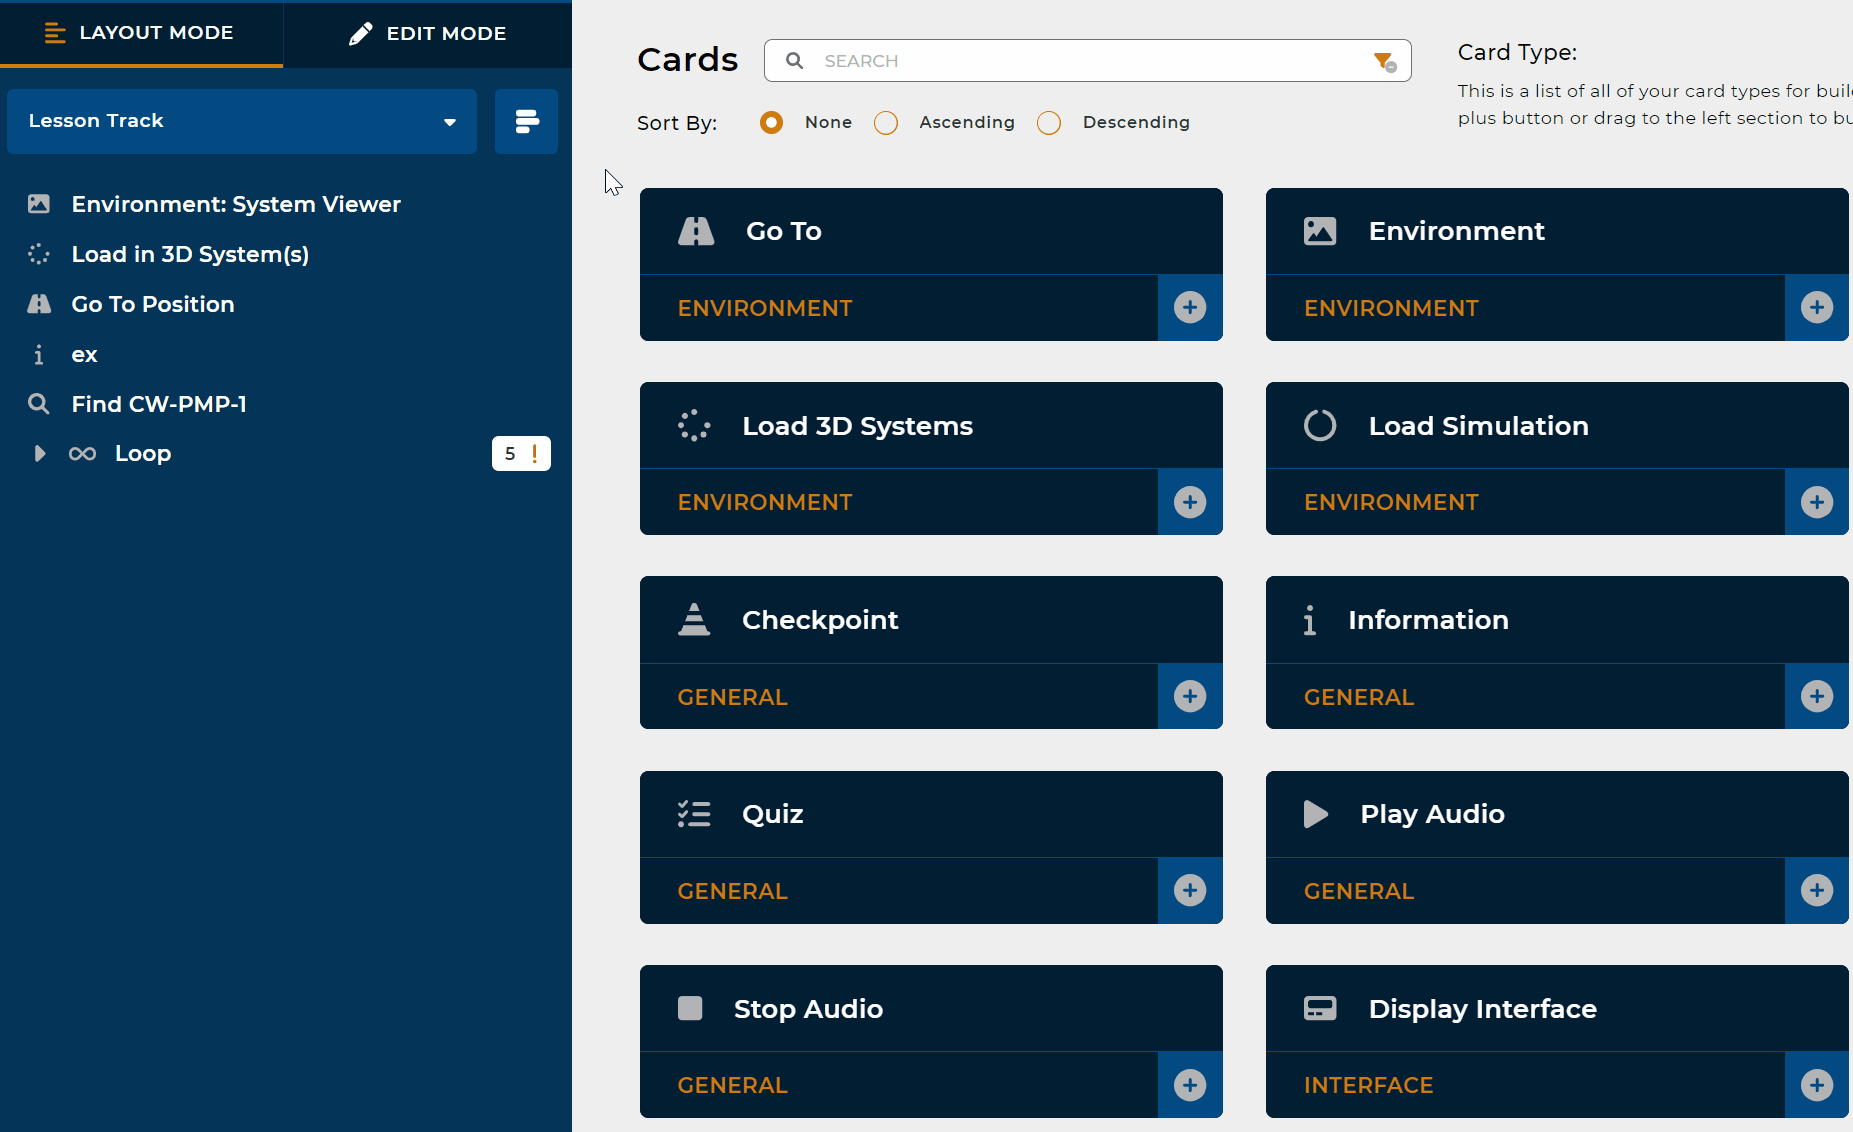
Your Lesson Outline should look similar to the image below:
.png "image(723).png")
Left click the Overview tab at the top of the Lesson Editor, then select Fragments in the left-hand pane
In the provided textbox, type the name of a Fragment you wish to add to your lesson, then left click the Add button
Repeat this step until you have added all desired Fragments
If you add a Fragment you no longer want, select that Fragment then left click the Delete button
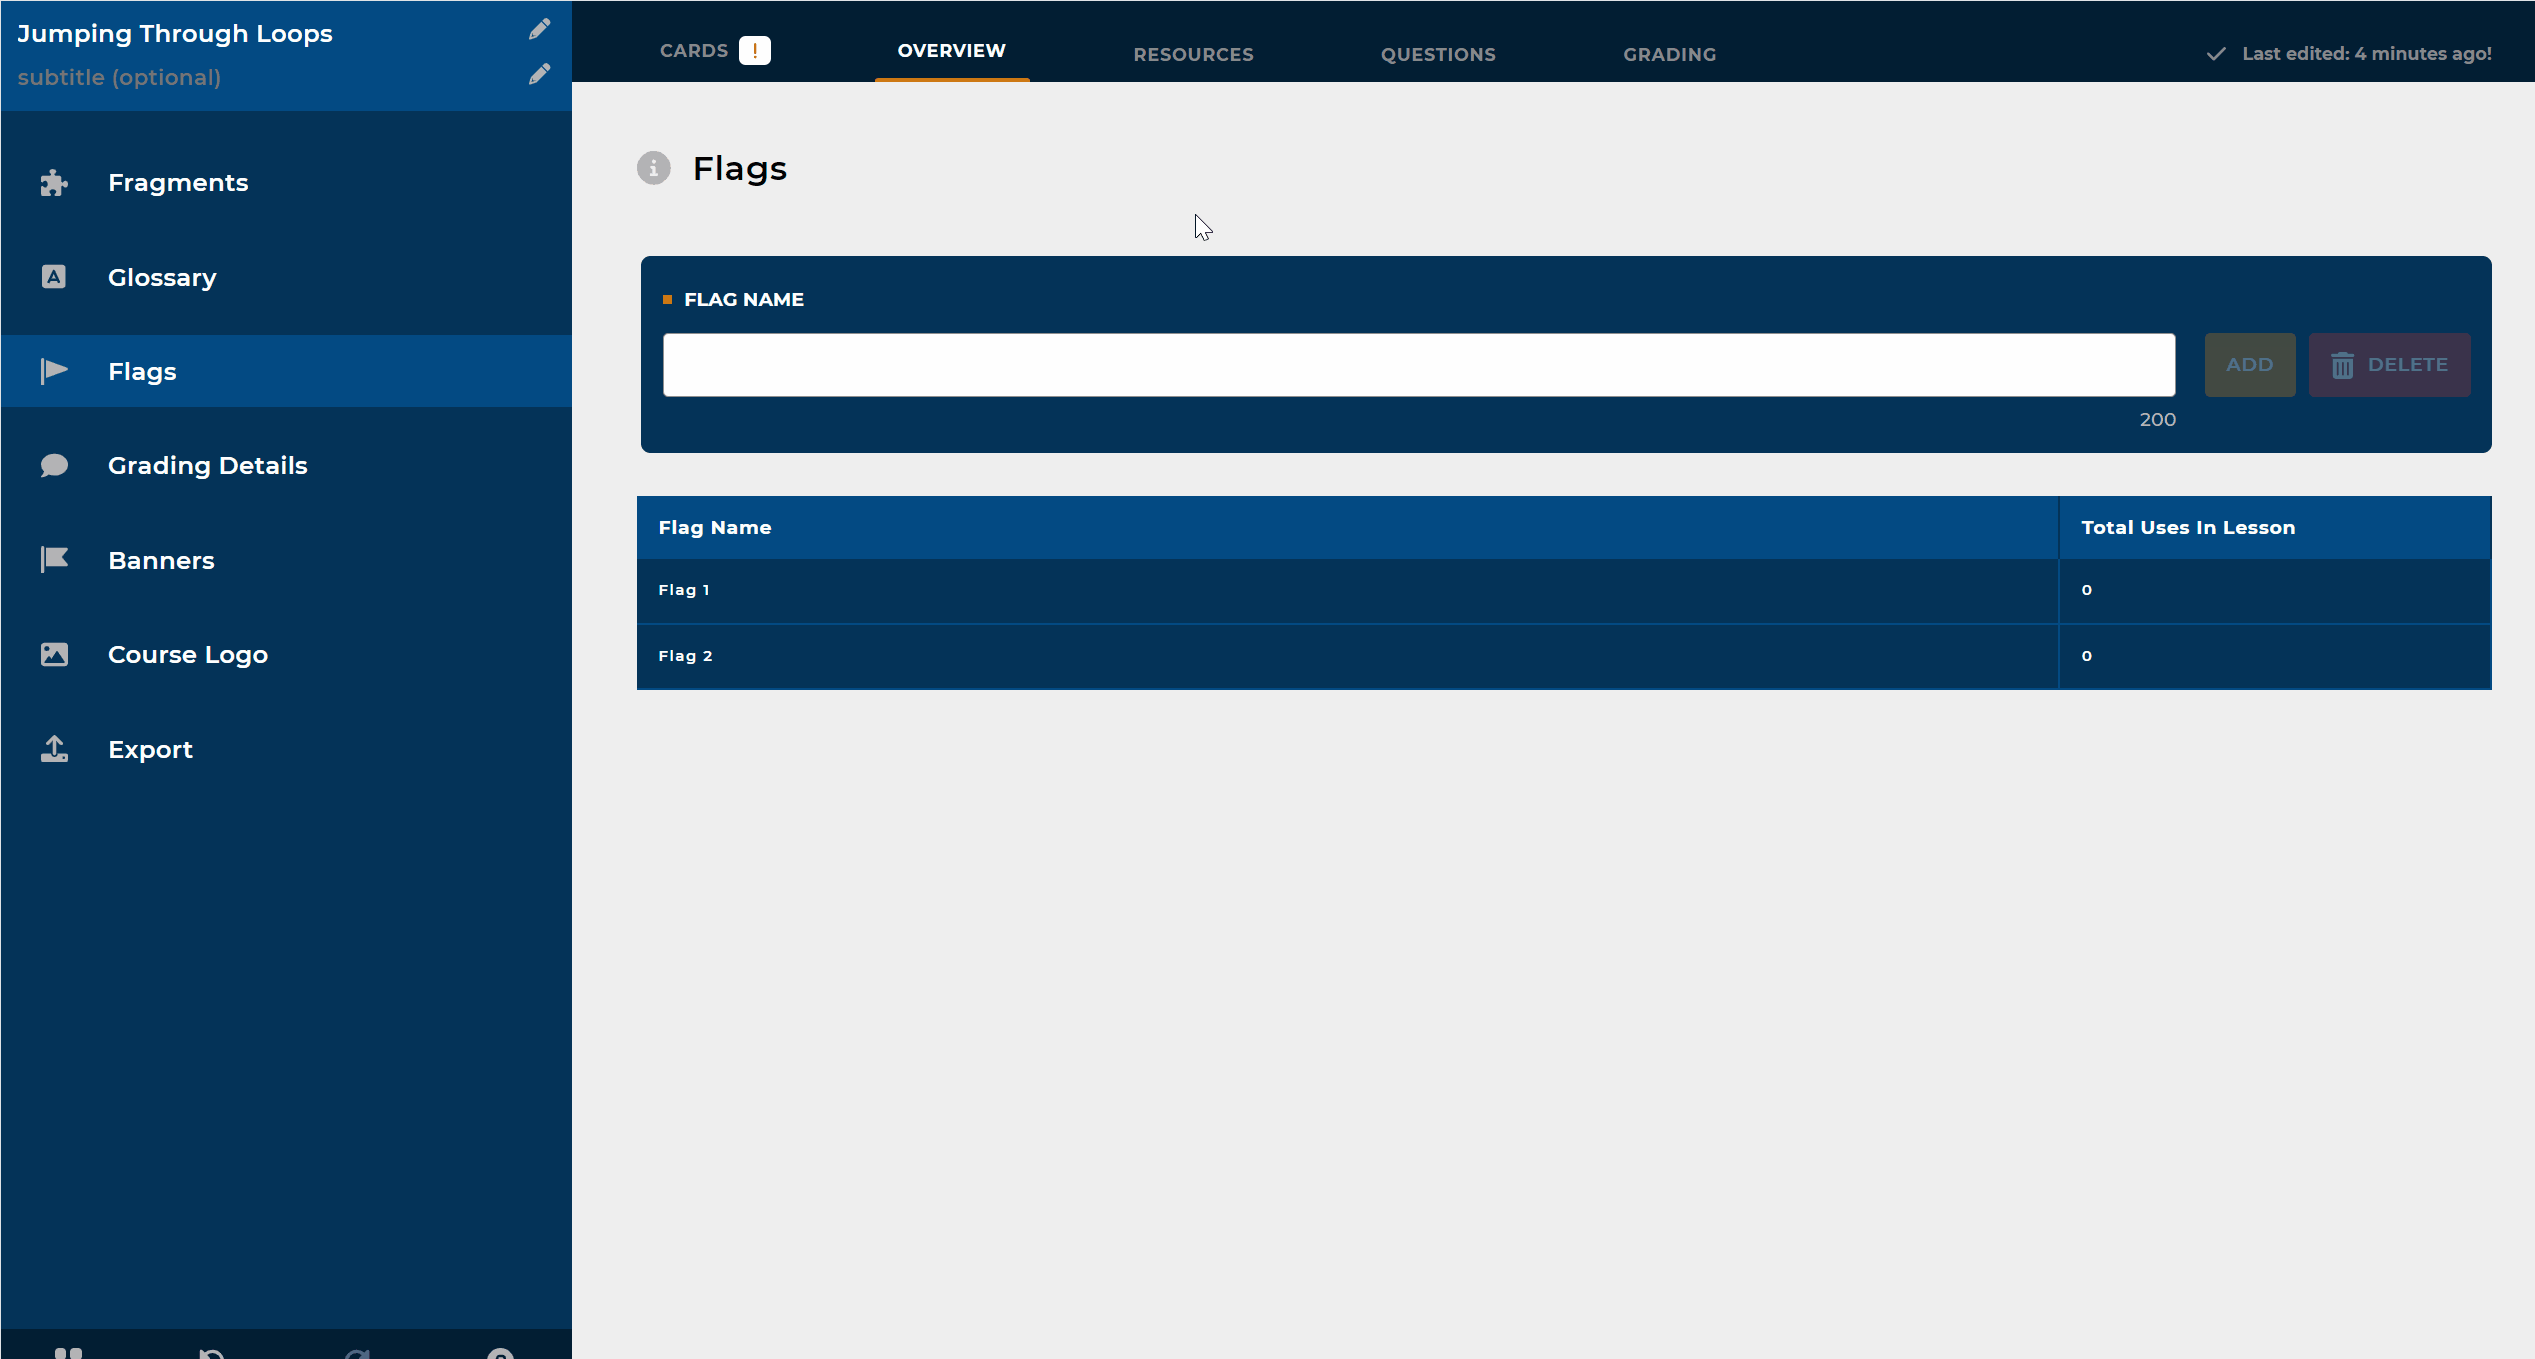
Remain on the Overview tab and select the Flags option in the left-hand pane
Use the textbox and ADD button to create a unique Flag for each Fragment
NOTE
It’s important to name these Flags something you will easily recognize.
The simplest solution is to create Flag names that exactly match your Fragment names
How to Use Loop, Decision, and Include Fragment Course Cards
Ensure you have completed all Prework steps in the above section
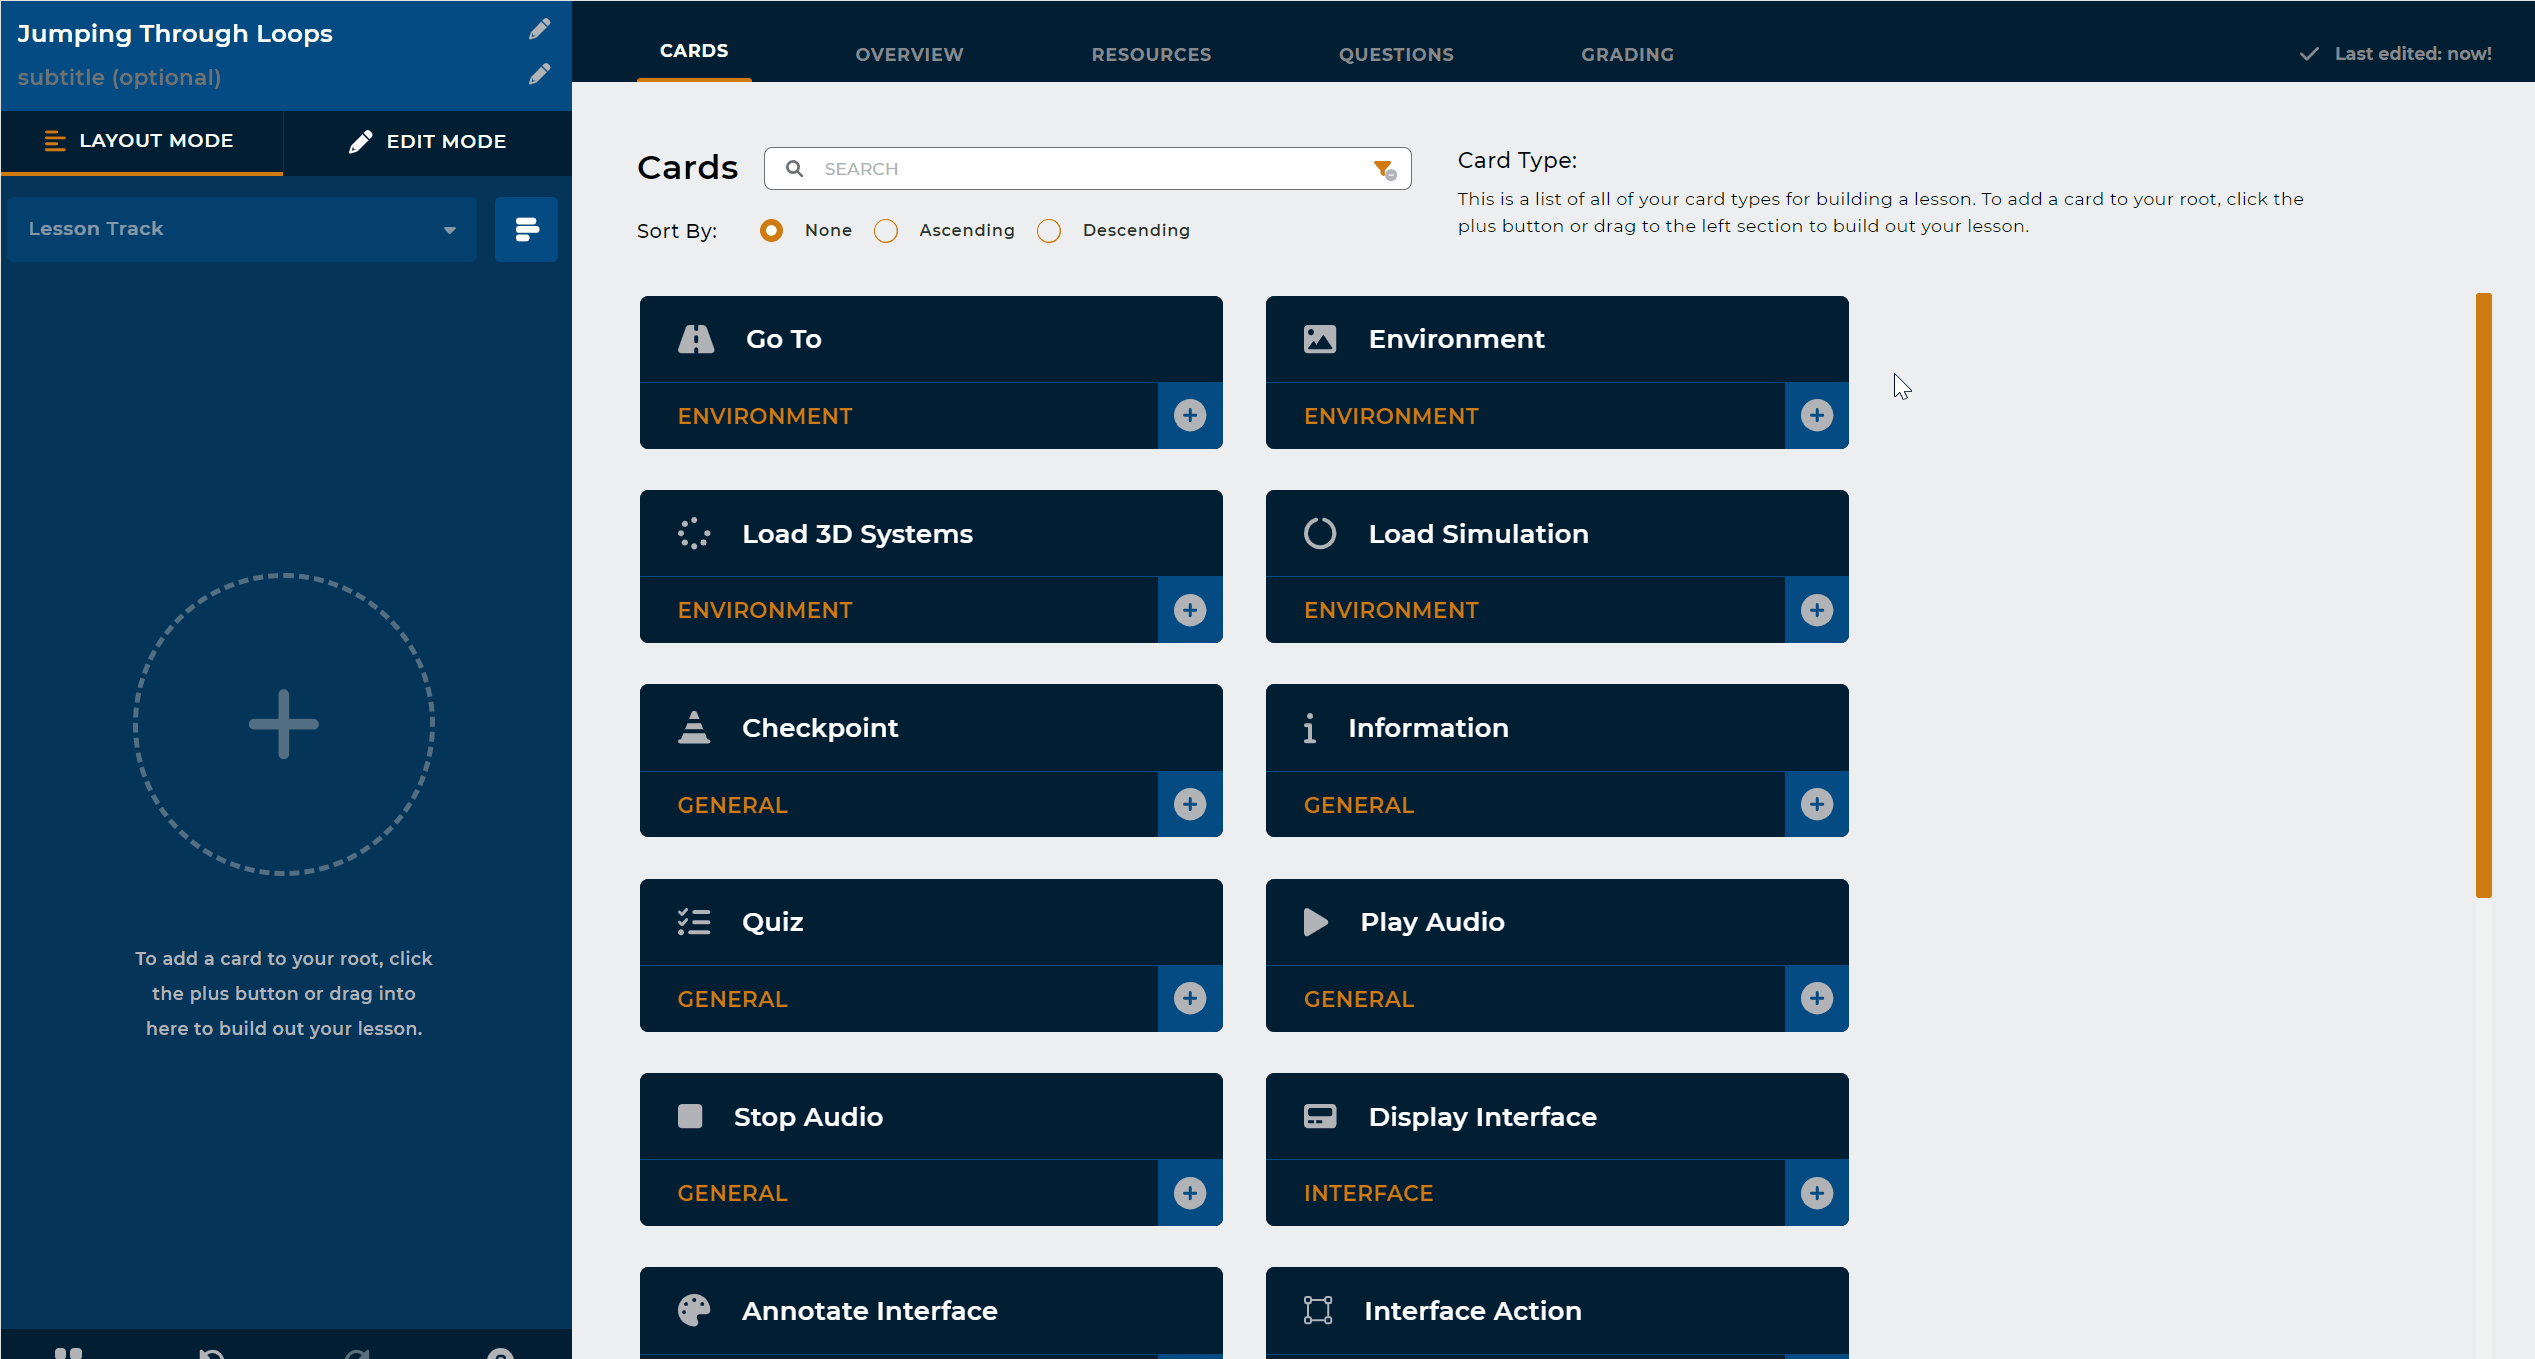
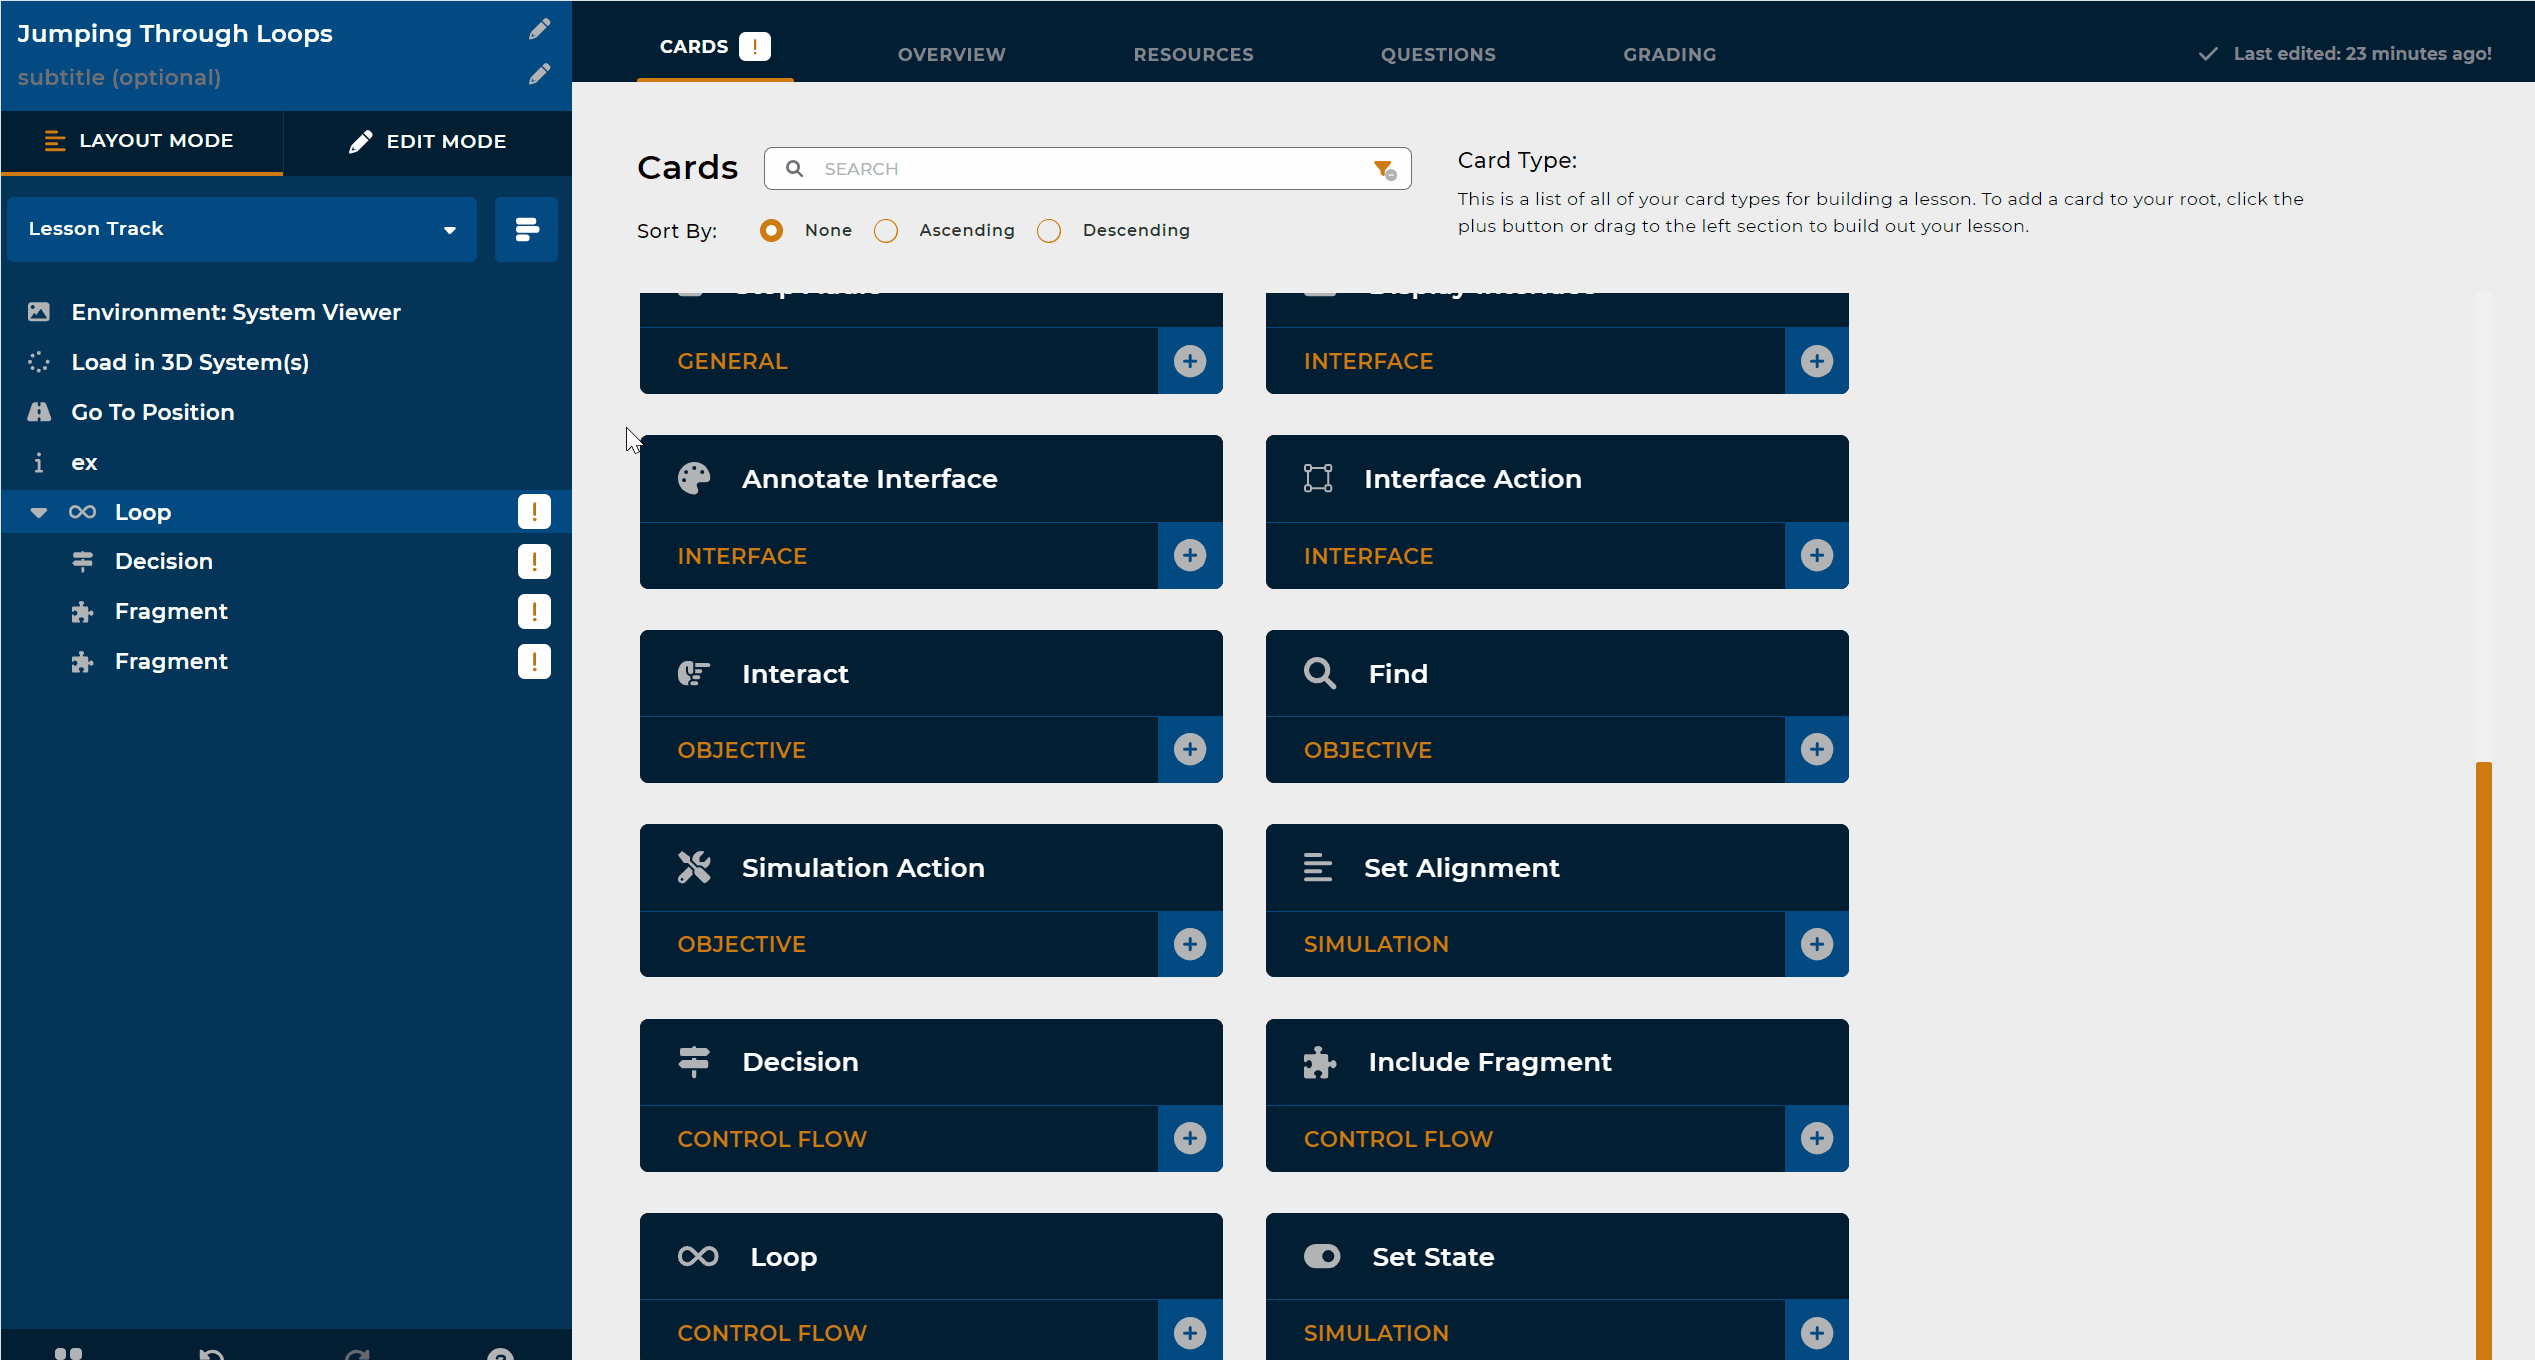
Select the Cards tab at the top of the screen to return to the Lesson Outline
Remain in the default Layout Mode
Use your cursor to select the unedited Loop card on the Lesson Outline
Add the following unedited course cards (which will nest below your existing Loop card):
.png "image(728).png")
Decision card
.png "image(725).png")
Include Fragment cards (one for each Fragment you created in the Prework section)
.png "image(726).png")
Select Edit Mode at the top of the left-hand pane
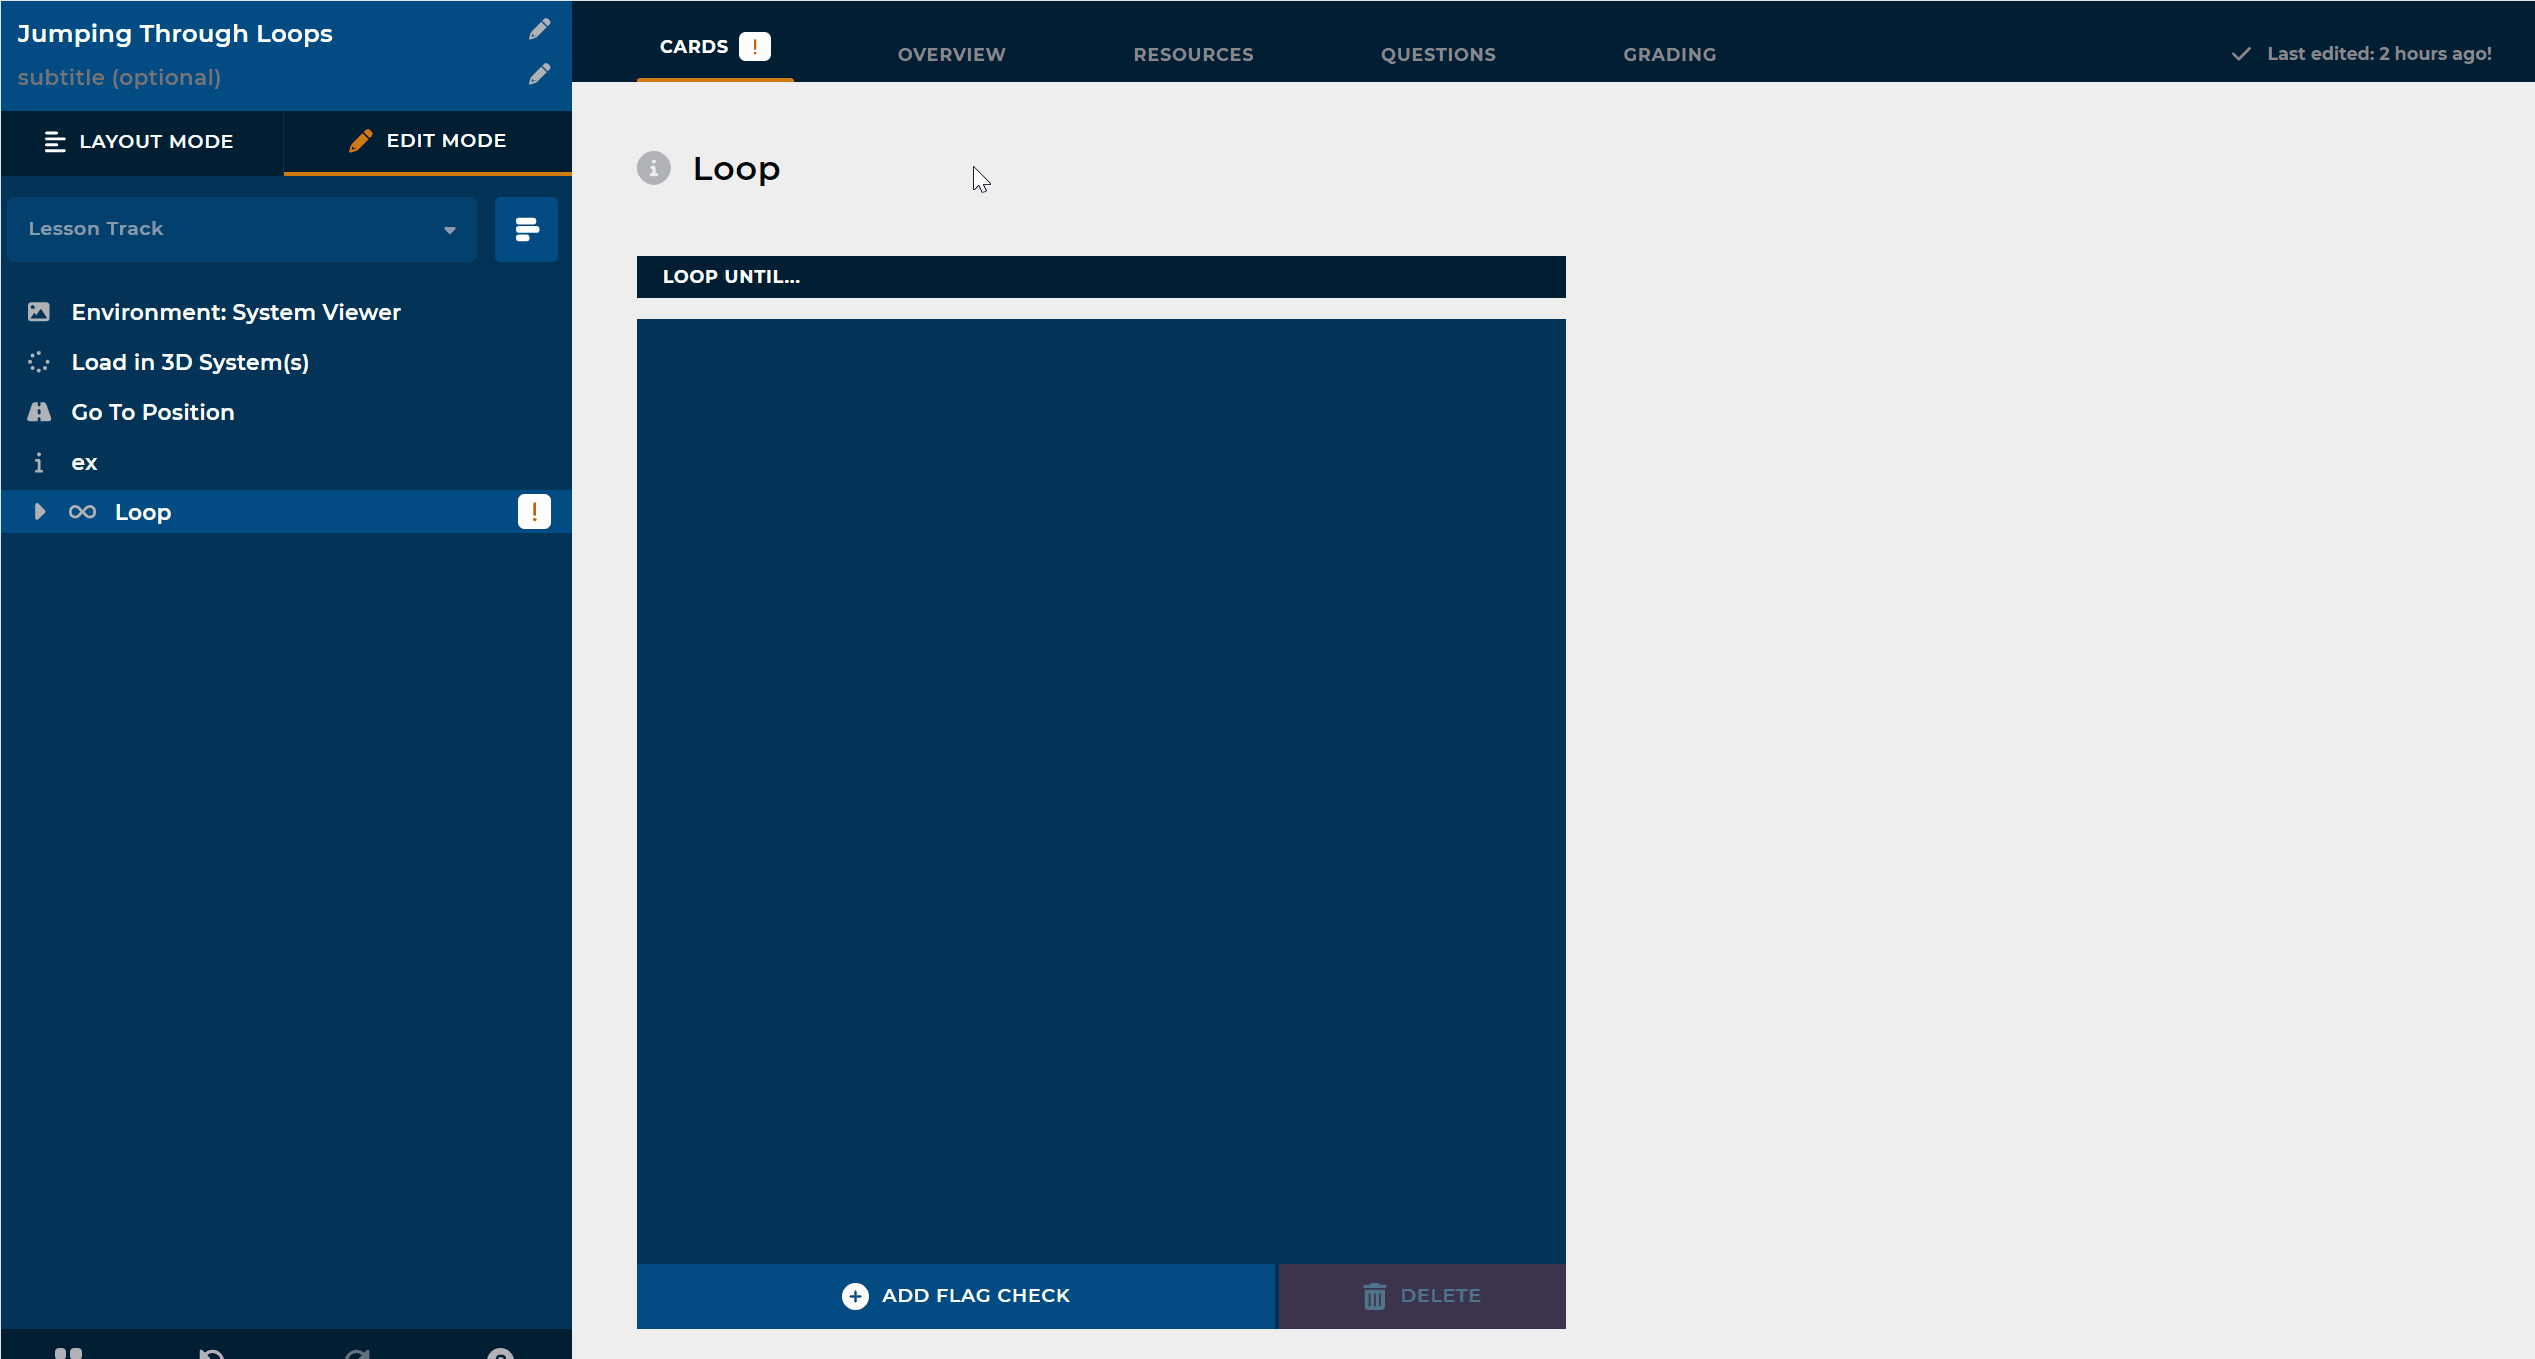
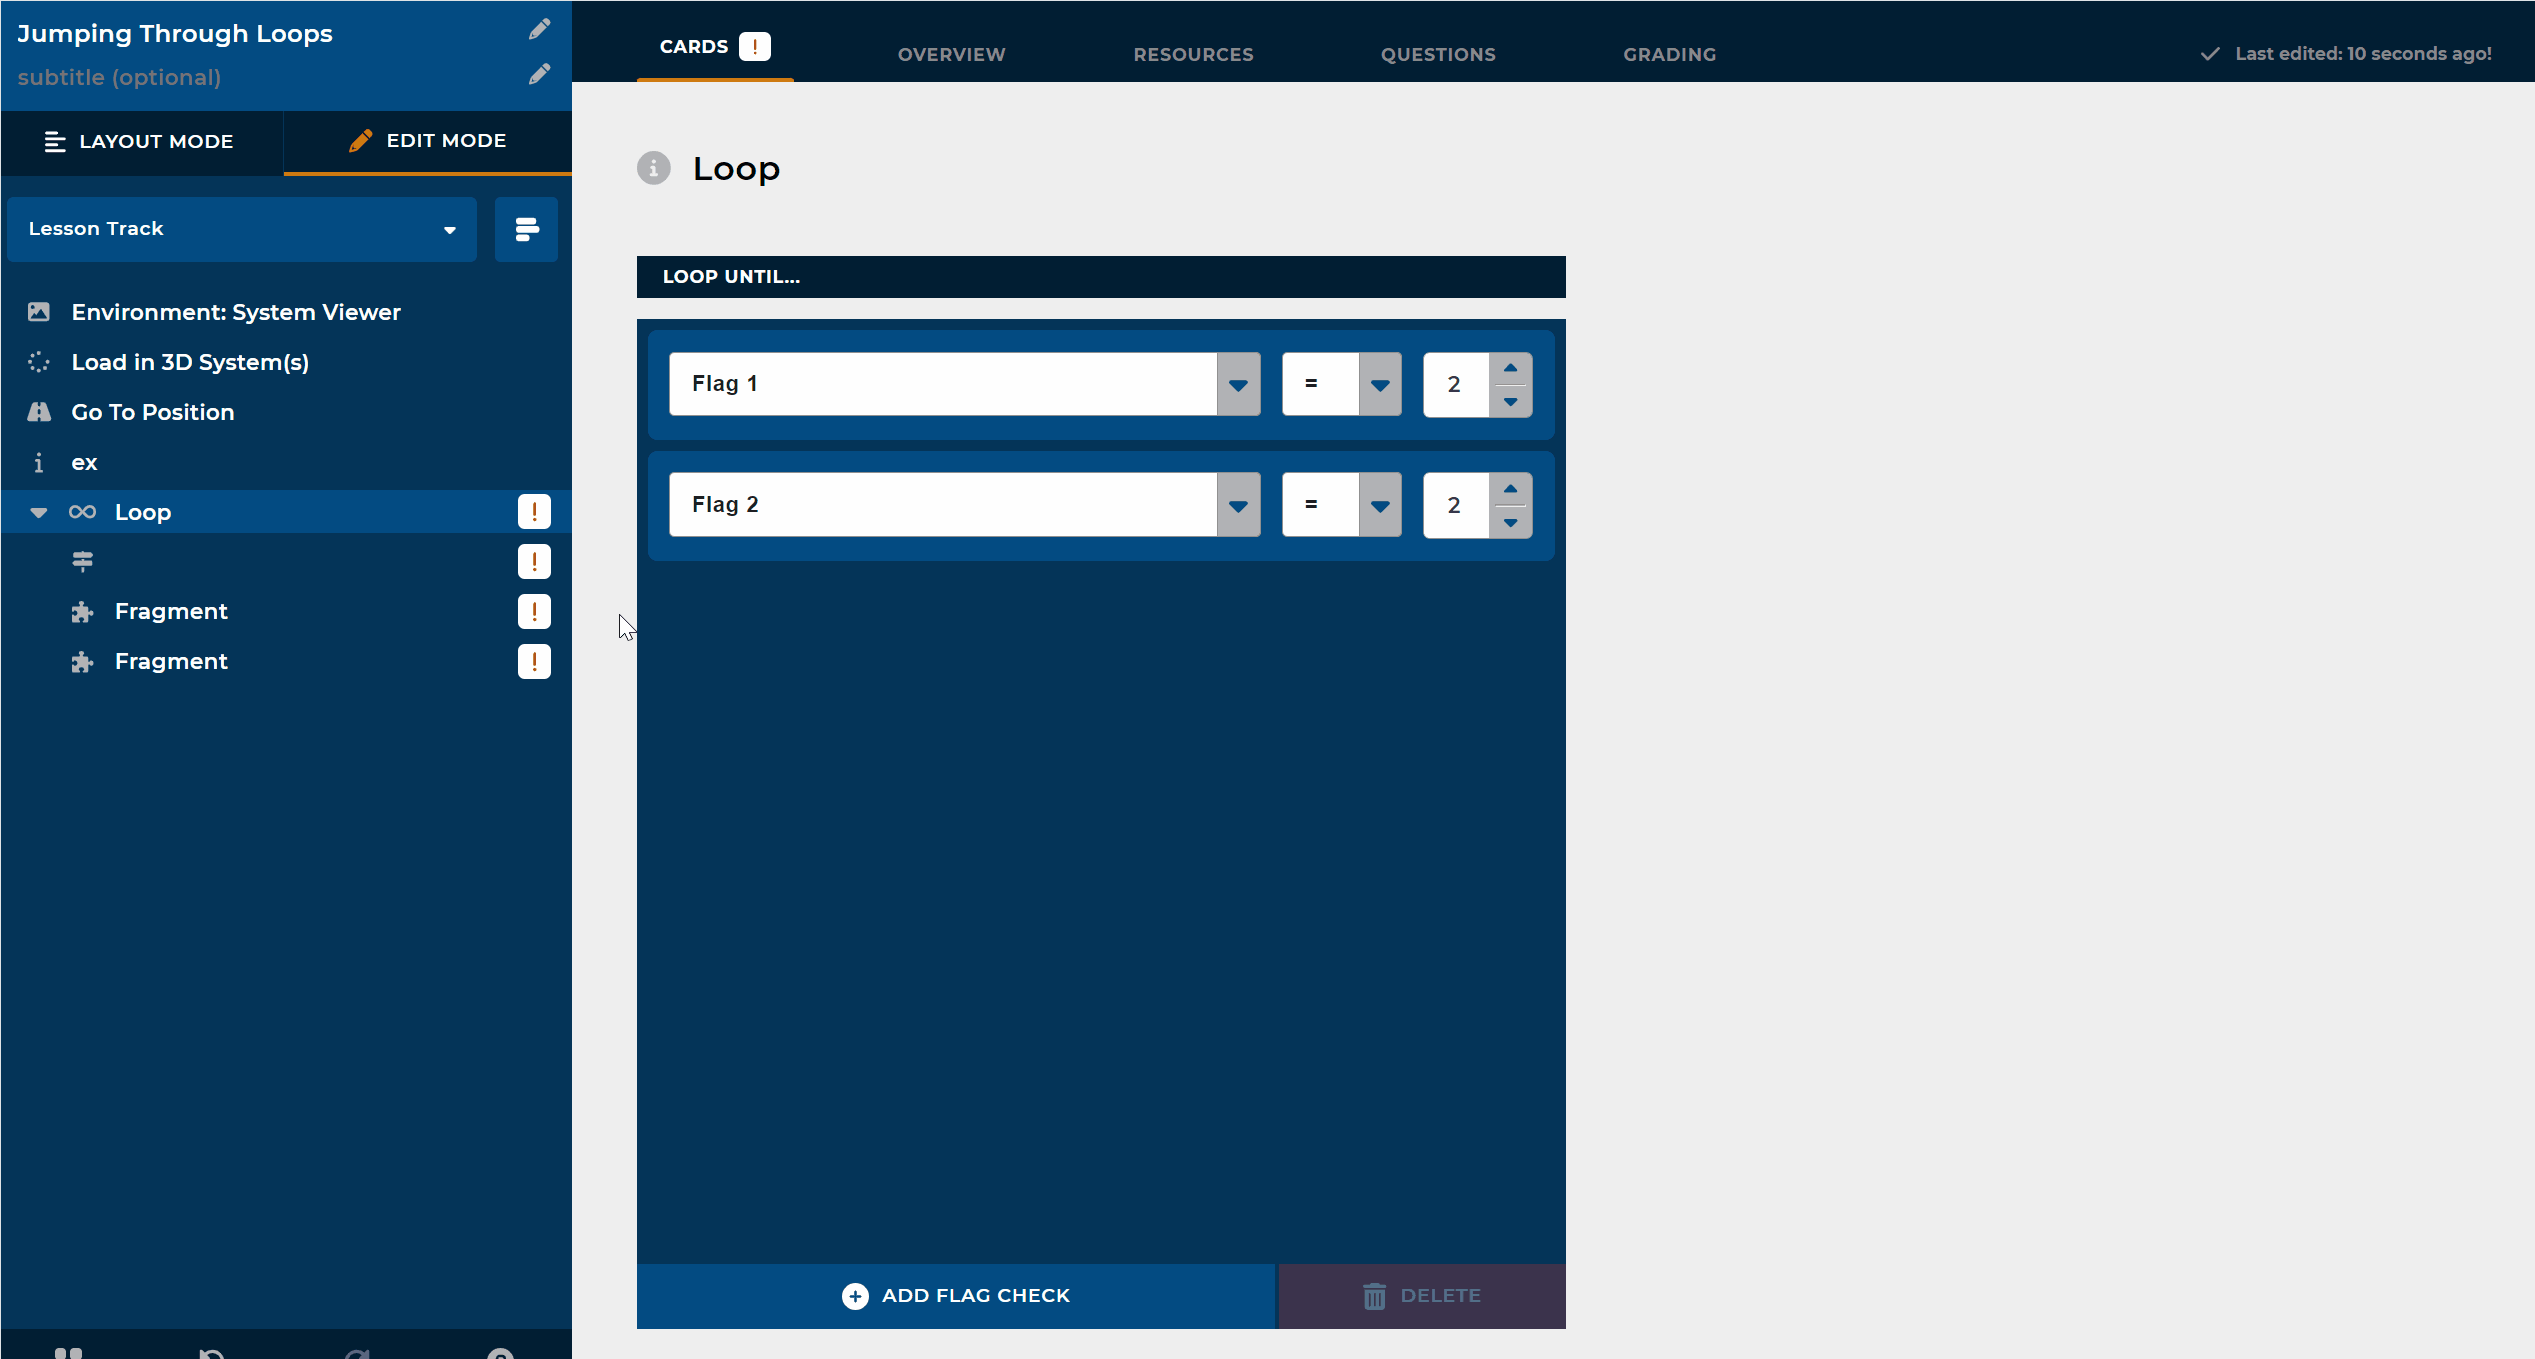
Select the Loop card on the Lesson Outline to open it for editing
Left click the +Add Flag Check button (lower left) to open a new entry line in the Loop Until window
Populate a separate Flag Check entry for each Flag you created in the Prework section
Use the dropdown arrow in the left-hand textbox to select the desired Flag
Leave the default equal sign in the middle textbox
Use the up arrow to populate the right-hand textbox with the value 2 (which means: loop until complete)
Numerical Values Assigned to Flags
A value of 1 means “not complete” and a value of 2 means “complete”.
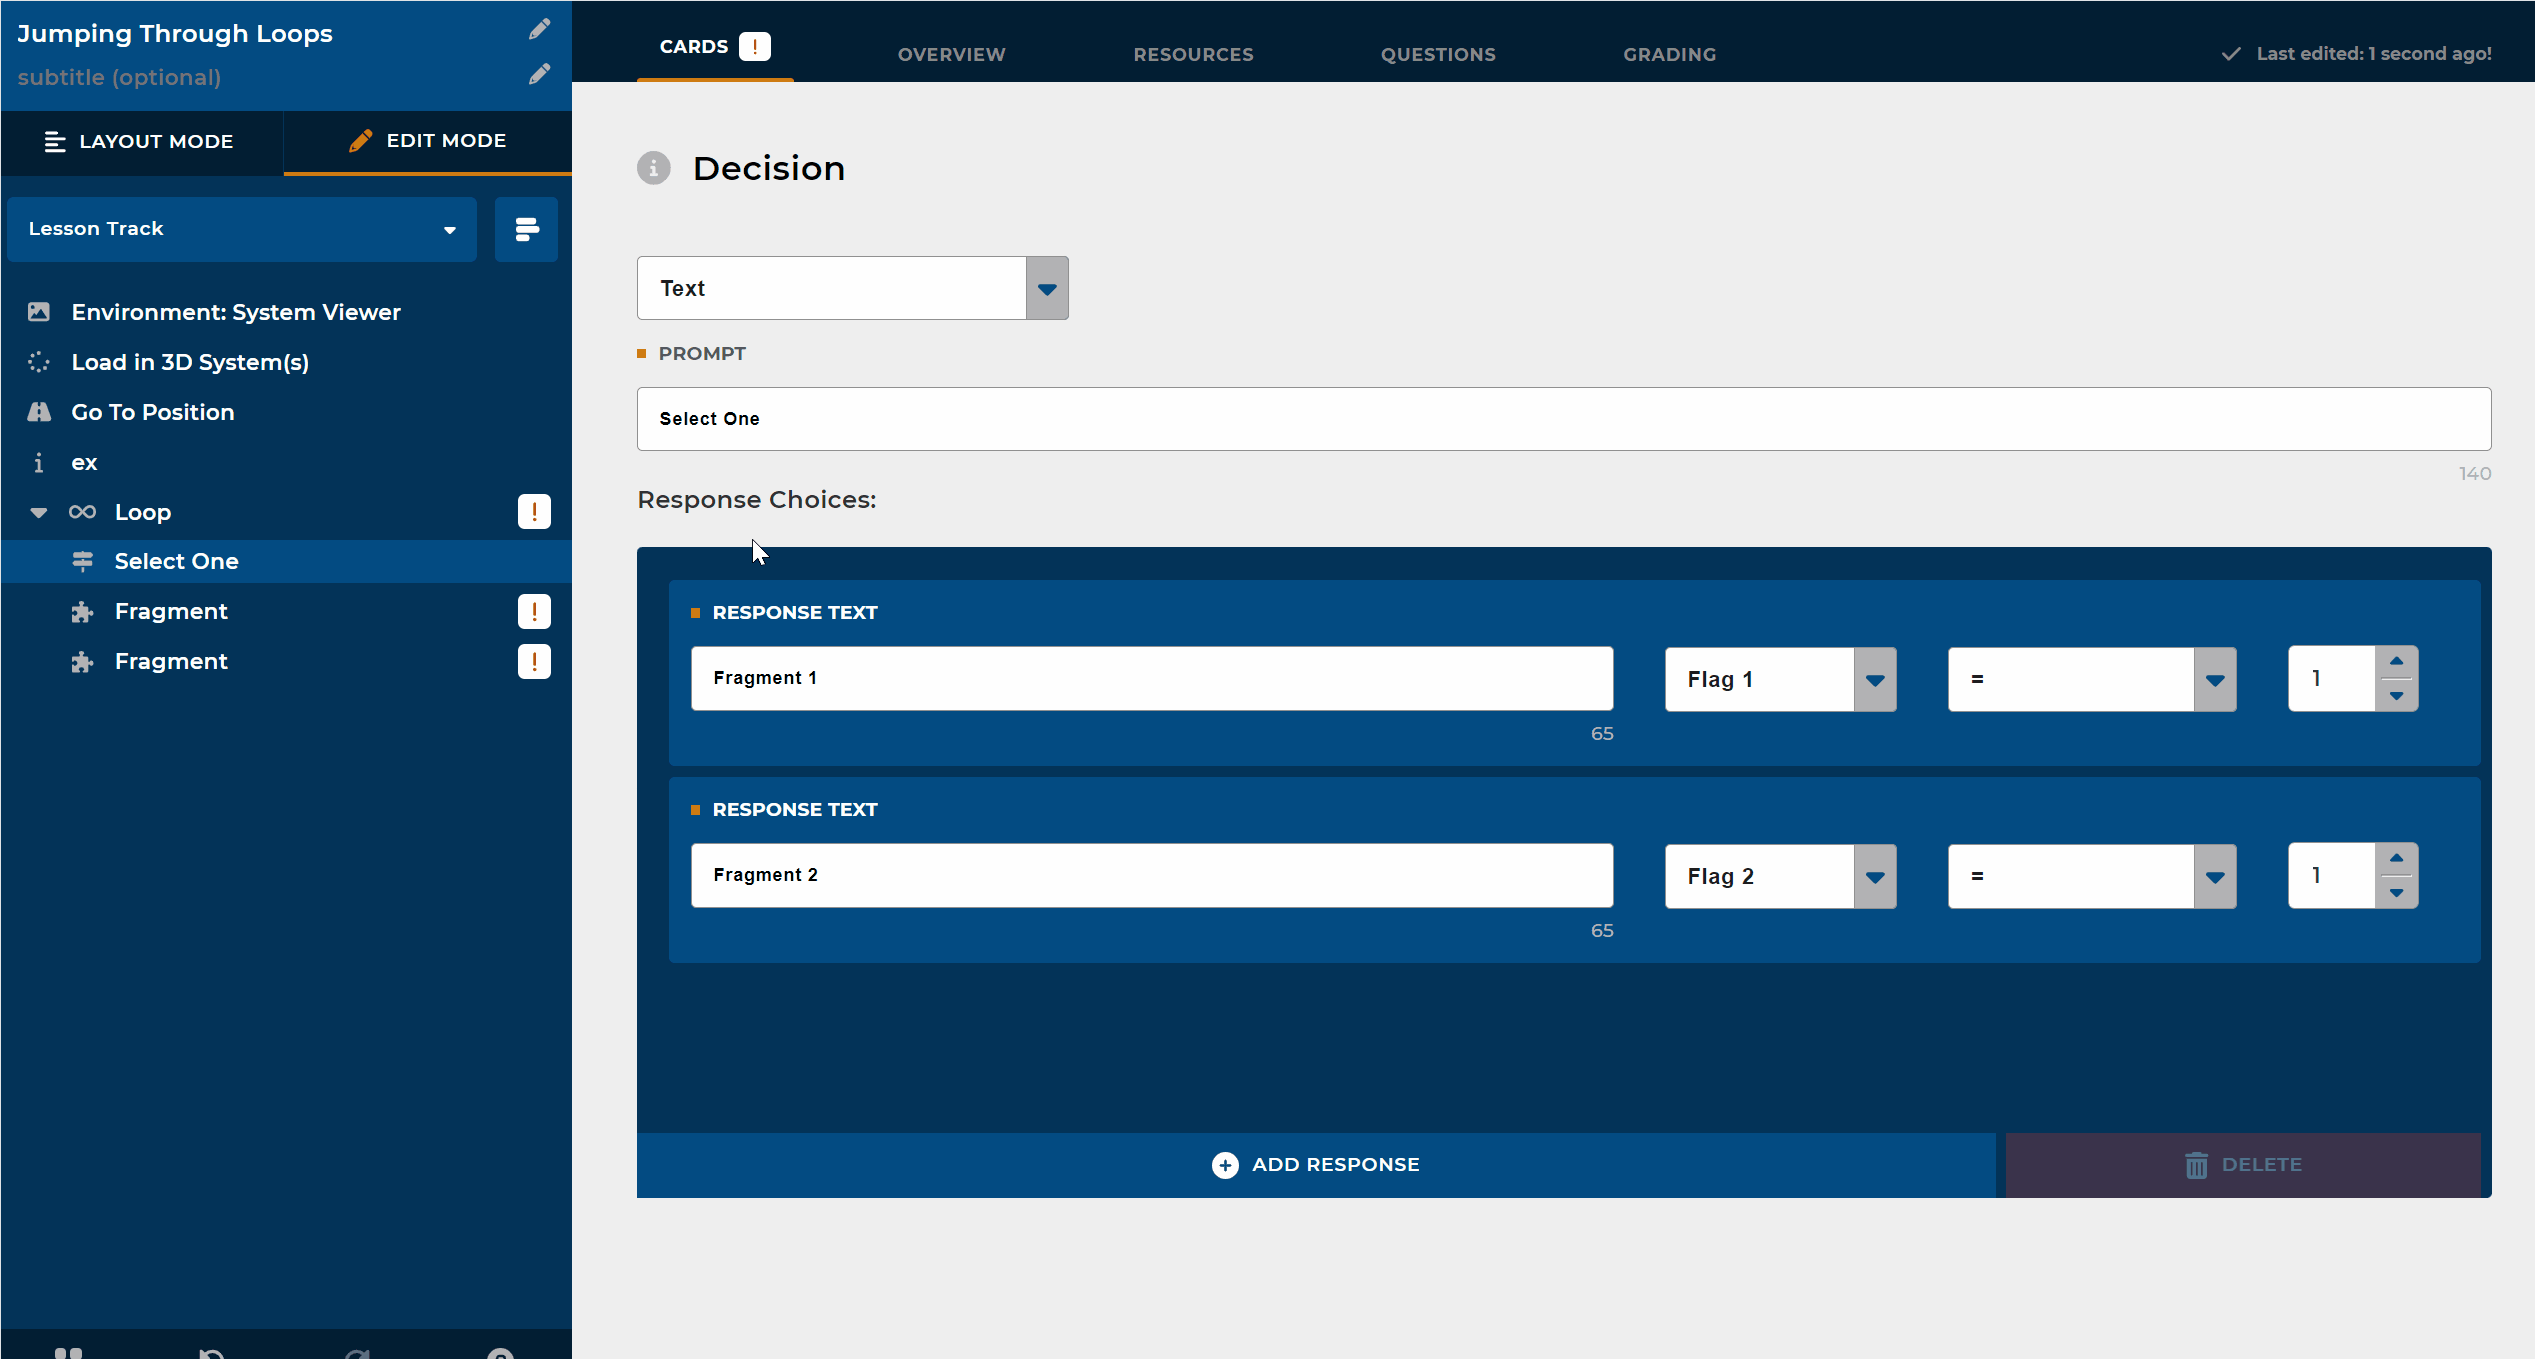
Select the Decision card in the Lesson Outline to open it for editing
Remain in the default Text mode
Other modes available but used infrequently
Type a simple question into the Prompt textbox (one that requires a user to select a particular Fragment)
Example: Which Component Group would you like to explore?
Left click the (lower left) +Add Response button to add a new Response Text entry line in the Response Choices section
Complete one Response Text entry for each Fragment you created in the Prework section
Populate the far left text box with the exact name of a desired Fragment
Use the dropdown arrow in the Select Flag textbox to select the Flag associated with that particular Fragment
Leave the default equal sign in the third textbox
Use the up arrow to populate the right-hand textbox with the value 1 (not complete)
Select the first Fragment card on the Lesson Outline to open it for editing
In the left-hand Select Fragment menu, left click the All Lessons dropdown arrow, then the arrow next to the name of your lesson
Select the Fragment you want to associate with this course card
In the right-hand Control Flow Flags menu, remain on the default “Run If…” tab
Left click the +Add Flag Check to create a new entry line
Use the dropdown arrow in the Select Flag textbox to choose the Flag associated with your selected Fragment
Keep the default equal sign in the middle textbox
Use the up arrow to populate the right-hand textbox with the value 1 (which means: Run this fragment if not complete)
(Still on the right-hand Control Flow Flags menu), left click the “On Completion…” tab
Left click the +Add Flag Check to create a new entry line
Use the dropdown arrow in the Select Flag textbox to choose the Flag associated with your selected Fragment
Keep the default equal sign in the middle textbox
Use the up arrow to populate the right-hand textbox with the value 2 (which means: Stop running this fragment if complete)
Repeat Step 8 for each additional Fragment card on the Lesson Outline, ensuring you have one card for each Fragment you created in the Prework section
NOTES
The Fragment cards nested within the Loop are for Flag management only
Do not add any other nested course card below these Fragment cards
Always add an unnested Environment card after the final Fragment card
This achieves functional lesson flow back to the Main Lesson track upon the completion of all looped Fragments
Proceed to the next section to learn how to develop a Lesson Fragment
How to Add Course Cards Within a Lesson Fragment
(If not already displayed), select your desired lesson on the left side panel
In Layout Mode, use the Lesson Track dropdown arrow to select a desired Fragment to build out
Ensure that all Fragments you plan to include in this lesson are listed in the Lesson Track
(If not, return to Step 9 in the above section)
Once you select a particular Fragment on the Lesson Track, simply add course cards as if you are creating a brand new lesson
A Lesson Fragment functions as a lesson within a lesson
Use the Lesson Tracker dropdown menu to access the course cards in a particular Lesson Fragment
Left click the four circles icon in the lower left corner of the left side panel to access the course cards in the Main Lesson
.png "image(752).png")
A Lesson Fragment will “loop” until its associated Flag in the Main Lesson is marked complete
Ensure all course cards included in a particular Lesson Fragment are relevant to that Fragment
Course Cards relevant to the entire lesson should be included in the Main Lesson outline
For Example:
Add a Quiz card to a Lesson Fragment if all quiz questions in the associated Question Pool(s) relate to that Fragment
Add a Quiz card to the Main Lesson if you prefer to have one Assessment that covers all Lesson Fragments
NOTE
Resources accessed in a Fragment must be added to any lesson(s) using that Fragment.
Repeat Steps 2 - 4 in this section until you have created fully-developed Lesson Fragments for each Fragment listed in the Lesson Track dropdown menu