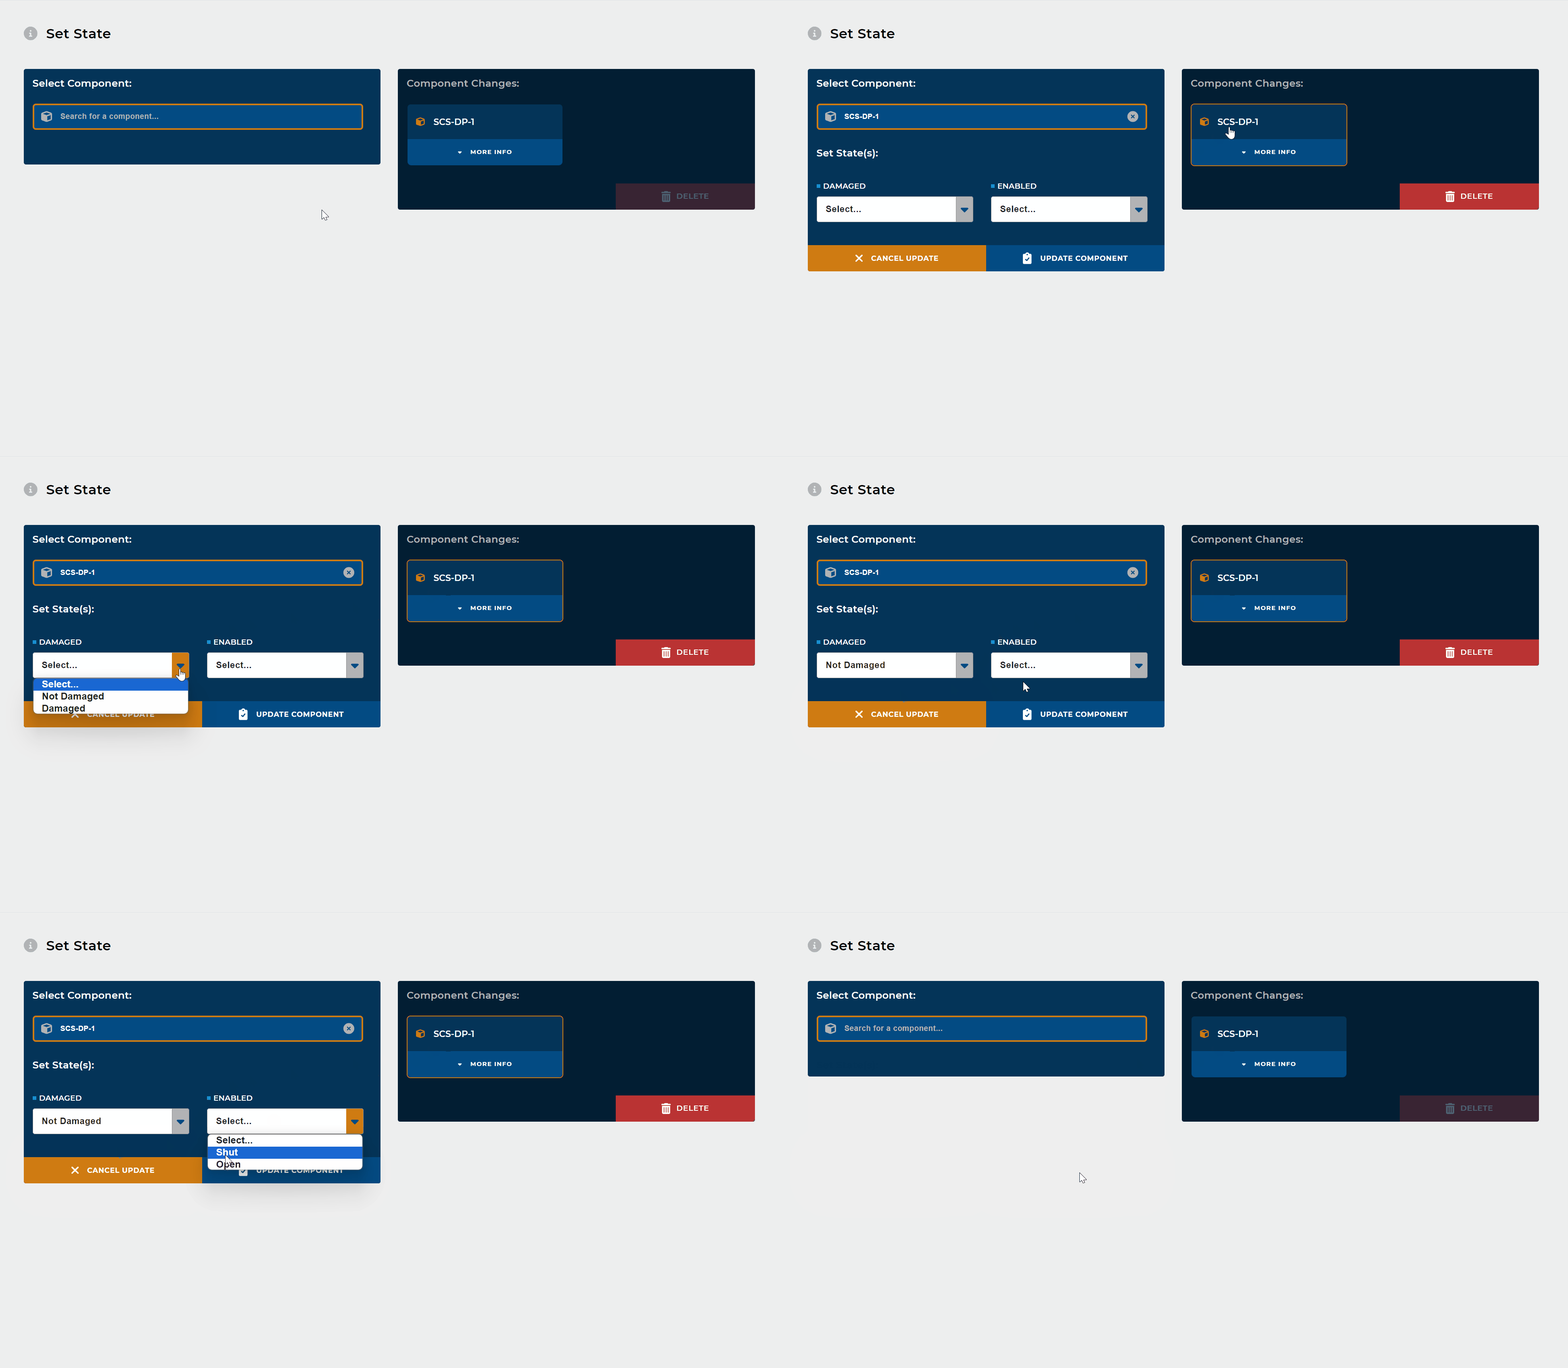
Use a Set State course card in Beast Core 4 Courseware Editor to change the state(s) of any component(s) in the Digital Twin.
Usage
Use the Set State card to set the initial load State(s) of Component(s) you want a learner to navigate to, locate, or interact with.
Use Case Example 1
Scenario: You want a learner to locate and open a specific undamaged component.
Add the course Cards shown in the chart below to your lesson
On the Set State card, use the search box to find your desired component
Set the following initial load states for your selected component:
Undamaged
Shut
On the Interact card, type the words Open $component in the Objective Message textbox and select the desired component
In the learner view, this component will be in the shut state when the learner initially locates it
The learner must interact with this component and change its state to open to progress the lesson
Course Card Order for Above Use Case | |
|---|---|
Environment: Avatar Viewer | |
Go To: (Space) | |
Set State | |
Go To: (Component) | |
Find: (Component) | |
Interact: (with Component) (Select the “state” change(s) the learner must select to progress the lesson) | |
Use Case Example 2
Scenario: You are planning a lesson in which the learner must change the states of several different components in the Avatar Viewer environment.
You only need one Environment: Avatar Viewer course card (at the beginning of this segment of the lesson)
You can use a single Set State card to set the initial load states for all components your learner will interact with in this section
Use a separate set of Go To, Find, and Interact cards for each component state change interaction
How to Populate a Set State Card
In Layout Mode, click the plus sign on a Set State card to add it to the Lesson Track
.png)
Left click Edit Mode to open the card for editing
.png)
Use the search bar to select a desired component
Left click the search bar to bring up a menu of available components
Or, type a component name or partial name
.png)
Choose your desired initial load component states from the Damaged and Enabled dropdown boxes
.png)
TIP
Keep in mind that you will later ask the learner to change one or more of these states.
Click Add Component
This action moves your component and set state selections to the right-hand Component Changes section of the screen
.png)
Repeat Steps 1 - 5 if you want to set initial load states for additional component(s)

How to View, Update, or Delete Items on a Set State Card
In the right-hand Component Changes box, left click the component you want to view, update settings for, or delete
.png)
View the current states set for this component entry in the Component Changes box
.png)
Update this entry’s component name or state selection(s) in the left-hand Select Components box
.png)
Left click the small x in the search box to select a different component
Use the Damaged and / or Enabled dropdown menus to select different state(s)
Left click Update Component to save your changes
Or, click Cancel Update if you are just viewing these settings and don’t want to change anything
To permanently remove a component entry, click the Delete button in the right-hand Component Changes box
